I decided to give Anvi’o a shot for this metagenomics analysis, as it seems ridiculously thorough and easy to use, with a nice-looking, interactive plotting interface. Additionally, they have a TON of clearly written tutorials on how to use their software and explanations of what’s happening when you use it! Really, couldn’t ask for much more. So, here’s how it went…
I used my MEGAHIT assembly of all samples combined (from 20190102 ) as the reference assembly and those trimmed FastQs for mapping each water sample to the reference assembly.
Here’s how the sample names breakdown:
| Sample | Develomental Stage (days post-fertilization) | pH Treatment |
|---|---|---|
| MG1 | 13 | 8.2 |
| MG2 | 17 | 8.2 |
| MG3 | 6 | 7.1 |
| MG5 | 10 | 8.2 |
| MG6 | 13 | 7.1 |
| MG7 | 17 | 7.1 |
I did hit a bit of a snag after I initially started this on 20190401:

By checking the SLURM output file, Anvi’o was showing that it was using 28 threads that required 478GB of memory, and since I was using a node in the coenv partition, I had insufficient memory (only 120GB)! Luckily, we have a 500GB node in the srlab partion. So, with some finagling I did the following in order to get this job to run faster (if I had left if running, it would have probably taken months to complete):
- killed Anvi’o job running on coenv node
- killed Maker job running on both srlab nodes
- started Anvi’o job running on srlab 500GB node
- queued Maker job on srlab nodes
- This has built-in checkpointing so will continue where it left off once Anvi’o job completes and MAKER job restarts!
Anyway, Anvi’o was run with default settings which means:
Contigs >2,500bp
Single-nucleotide variant (SNV) calls only on those with >10x coverage
Here’s the excellent Anvi’o tutorial on metagenomics profilling that I followed.
SBATCH script:
#!/bin/bash
## Job Name
#SBATCH --job-name=anvio
## Allocation Definition
#SBATCH --account=srlab
#SBATCH --partition=srlab
## Resources
## Nodes
#SBATCH --nodes=1
## Walltime (days-hours:minutes:seconds format)
#SBATCH --time=25-00:00:00
## Memory per node
#SBATCH --mem=500G
##turn on e-mail notification
#SBATCH --mail-type=ALL
#SBATCH --mail-user=samwhite@uw.edu
## Specify the working directory for this job
#SBATCH --workdir=/gscratch/scrubbed/samwhite/outputs/20190401_metagenomics_pgen_anvio

# Exit script if a command fails
set -e

# Load Anaconda virtual environment with Anvio 5.4
## Environment created earlier:
## conda create --name anvio54 -c conda-forge -c bioconda anvio==5.4.0 "blas=*=openblas" python=3.6
module load anaconda3_5.3
. /sw/anaconda-5.3/python3.7/etc/profile.d/conda.sh
conda activate anvio54

# Load Open MPI module for parallel, multi-node processing

module load icc_19-ompi_3.1.2

# SegFault fix?
export THREADS_DAEMON_MODEL=1

# Document programs in PATH (primarily for program version ID)

date >> system_path.log
echo "" >> system_path.log
echo "System PATH for $SLURM_JOB_ID" >> system_path.log
echo "" >> system_path.log
printf "%0.s-" {1..10} >> system_path.log
echo ${PATH} | tr : \\n >> system_path.log


# variables
wd=$(pwd)
cpus=28
megahit_assembly=/gscratch/srlab/sam/data/metagenomics/P_generosa/assemblies/final.contigs.fa
fastq_dir=/gscratch/srlab/sam/data/metagenomics/P_generosa
ref_assembly_renamed="megahit_assembly.renamed"
ref_assembly_renamed_fasta="megahit_assembly.renamed.fa"

## Inititalize arrays
samples_array=(MG1 MG2 MG3 MG5 MG6 MG7)
fastq_array_R1=()
fastq_array_R2=()

## Programs
bbmap_dir=/gscratch/srlab/programs/bbmap_38.34
anvi_dir=/usr/lusers/samwhite/.conda/envs/anvio54/bin
samtools=/gscratch/srlab/programs/samtools-1.9/samtools

# Create array of fastq R1 files
for fastq in ${fastq_dir}/*R1*.gz
do
  fastq_array_R1+=(${fastq})
done

# Create array of fastq R2 files
for fastq in ${fastq_dir}/*R2*.gz
do
  fastq_array_R2+=(${fastq})
done

# Create list of fastq files used in analysis
## Uses parameter substitution to strip leading path from filename
for fastq in ${fastq_dir}*.gz
do
  echo ${fastq##*/} >> fastq.list.txt
done

##########################
# Reformat FastA deflines for reference assembly
${anvi_dir}/anvi-script-reformat-fasta \
${megahit_assembly} \
-o ${ref_assembly_renamed_fasta} \
--simplify-names \
-l 0 \
--report-file ${ref_assembly_renamed}.txt

# Create FastA index
${samtools} faidx ${ref_assembly_renamed_fasta}

# Create Anvio database
${anvi_dir}/anvi-gen-contigs-database \
-f ${ref_assembly_renamed_fasta} \
-o contigs.db \
--project-name "metagenome geoduck contigs"
##########################

# Run HMMs
${anvi_dir}/anvi-run-hmms \
-c contigs.db \
--num-threads ${cpus}

# Assign Clusters of Orthologous Groups (COGs)
${anvi_dir}/anvi-run-ncbi-cogs \
-c contigs.db \
--num-threads ${cpus}
##########################

# Process individual samples
# Re-label FastAs
for sample in ${!samples_array[@]}
do
  sample_name=$(echo ${samples_array[sample]})
  ##########################
  # Reformat FastA deflines
  ${anvi_dir}/anvi-script-reformat-fasta \
  ${ref_assembly_renamed_fasta} \
  -o ${sample_name}.renamed.fa \
  --simplify-names \
  -l 0 \
  --report-file ${sample_name}.renamed.txt
  ##########################
  # Create FastA index
  ${samtools} faidx ${sample_name}.renamed.fa
  ##########################
  # Map reads to FastAs
  ${bbmap_dir}/bbwrap.sh \
  ref=${ref_assembly_renamed_fasta} \
  in1=${fastq_array_R1[sample]} \
  in2=${fastq_array_R2[sample]} \
  out=${sample_name}.aln.sam.gz
  ##########################
  # Convert SAM to BAM
  gunzip < ${sample_name}.aln.sam.gz > ${sample_name}.RAW.sam
  ${samtools} view -bS --threads ${cpus} ${sample_name}.RAW.sam > ${sample_name}.RAW.bam
  ${anvi_dir}/anvi-init-bam \
  ${sample_name}.RAW.bam \
  -o ${sample_name}.bam
  ##########################
  ##########################
  # Create Anvio profile database
  ${anvi_dir}/anvi-profile \
  -i ${sample_name}.bam \
  -c contigs.db \
  --sample-name ${sample_name} \
  --num-threads ${cpus}
done

# Merge Anvi databases
${anvi_dir}/anvi-merge \
*/PROFILE.db \
-o SAMPLES-MERGED \
-c contigs.db
RESULTS
Whew! This took quite some time to run (over two weeks!):

All the stuff below is to give a simple overview of what Anvi’s has generated. More detailed exploration/analysis will happen later.
Output folder:
“Important” files. The following files are the three core files needed to run Anvi’o’s interactive plotting interface:
20190401_metagenomics_pgen_anvio/SAMPLES-MERGED/PROFILE.db (2.1GB)
20190401_metagenomics_pgen_anvio/SAMPLES-MERGED/AUXILIARY-DATA.db (1.6GB)
Command to generate interactive plot:
anvi-interactive -p PROFILE.db -c contigs.db -C CONCOCT
Then, in my case, a browser window opens, but doesn’t produce anything. So, in that window I need to enter the following URL to see the plotting interface:
http://0.0.0.0:8080
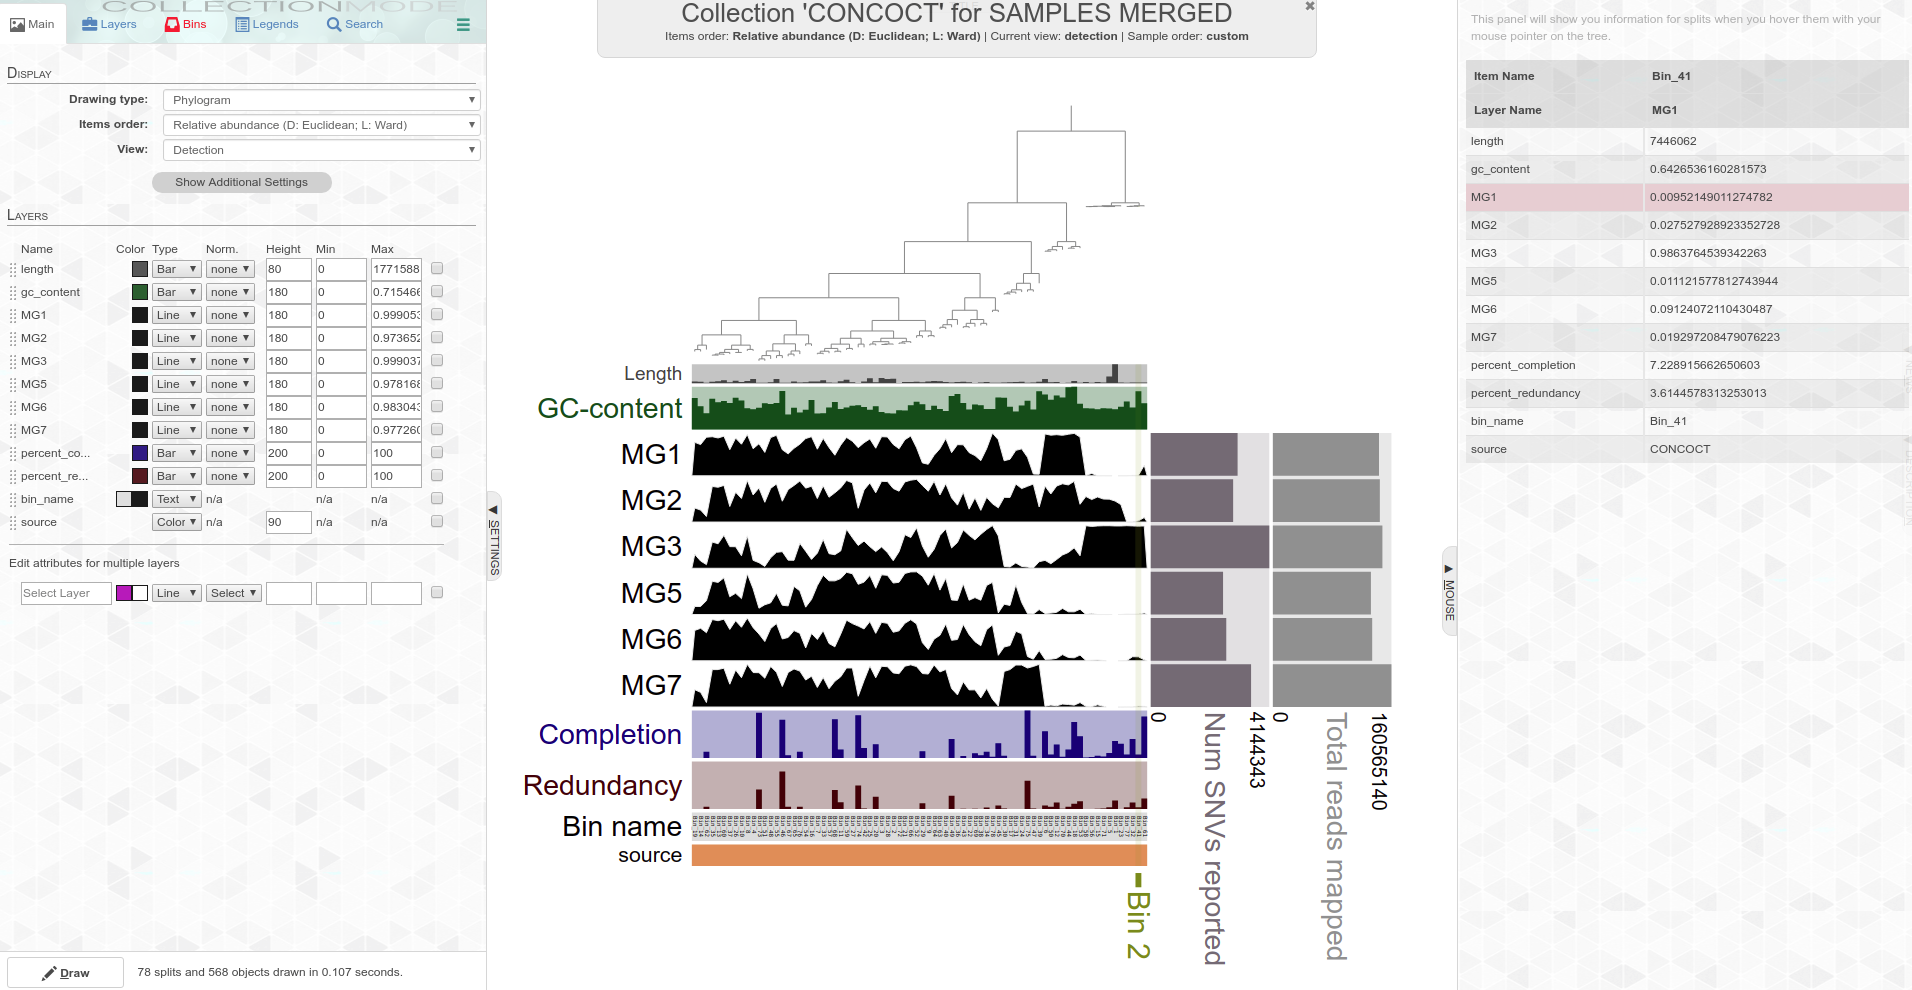
Screencaps of interactive plot interfaces:
Circular phylogram

Standard phylogram

The plot(s) above are showing the results of CONCOCT genome binning (this is built-in with Anvi’o) and detection of those genomes across all the samples.
There’s a lot going on here that needs further exploration data-wise, as well as just how to understand the Anvi’o plotting interface (e.g. what do all the different views actually mean, how to rename samples, what does the summarize command produce, etc.). I’ll explore this further later on.