INTRO
Steven has created a Shiny app (website) that will allow the public to plot/interact with some of the resazurin data that the lab’s been collecting. He assigned me to tackle getting a Shiny server set up on one our lab servers so that we don’t have to rely on free options, which can be limited.
This post documents the process of deploying a Shiny Server using Synology’s Container Manager on Gannet (Synology server). The goal was to host a custom Shiny app for public data visualization, using the official Rocker image and mounting the necessary volumes for persistent app storage.
Step-by-Step Instructions
Open Synology Container Manager and search for the Rocker image on DockerHub.
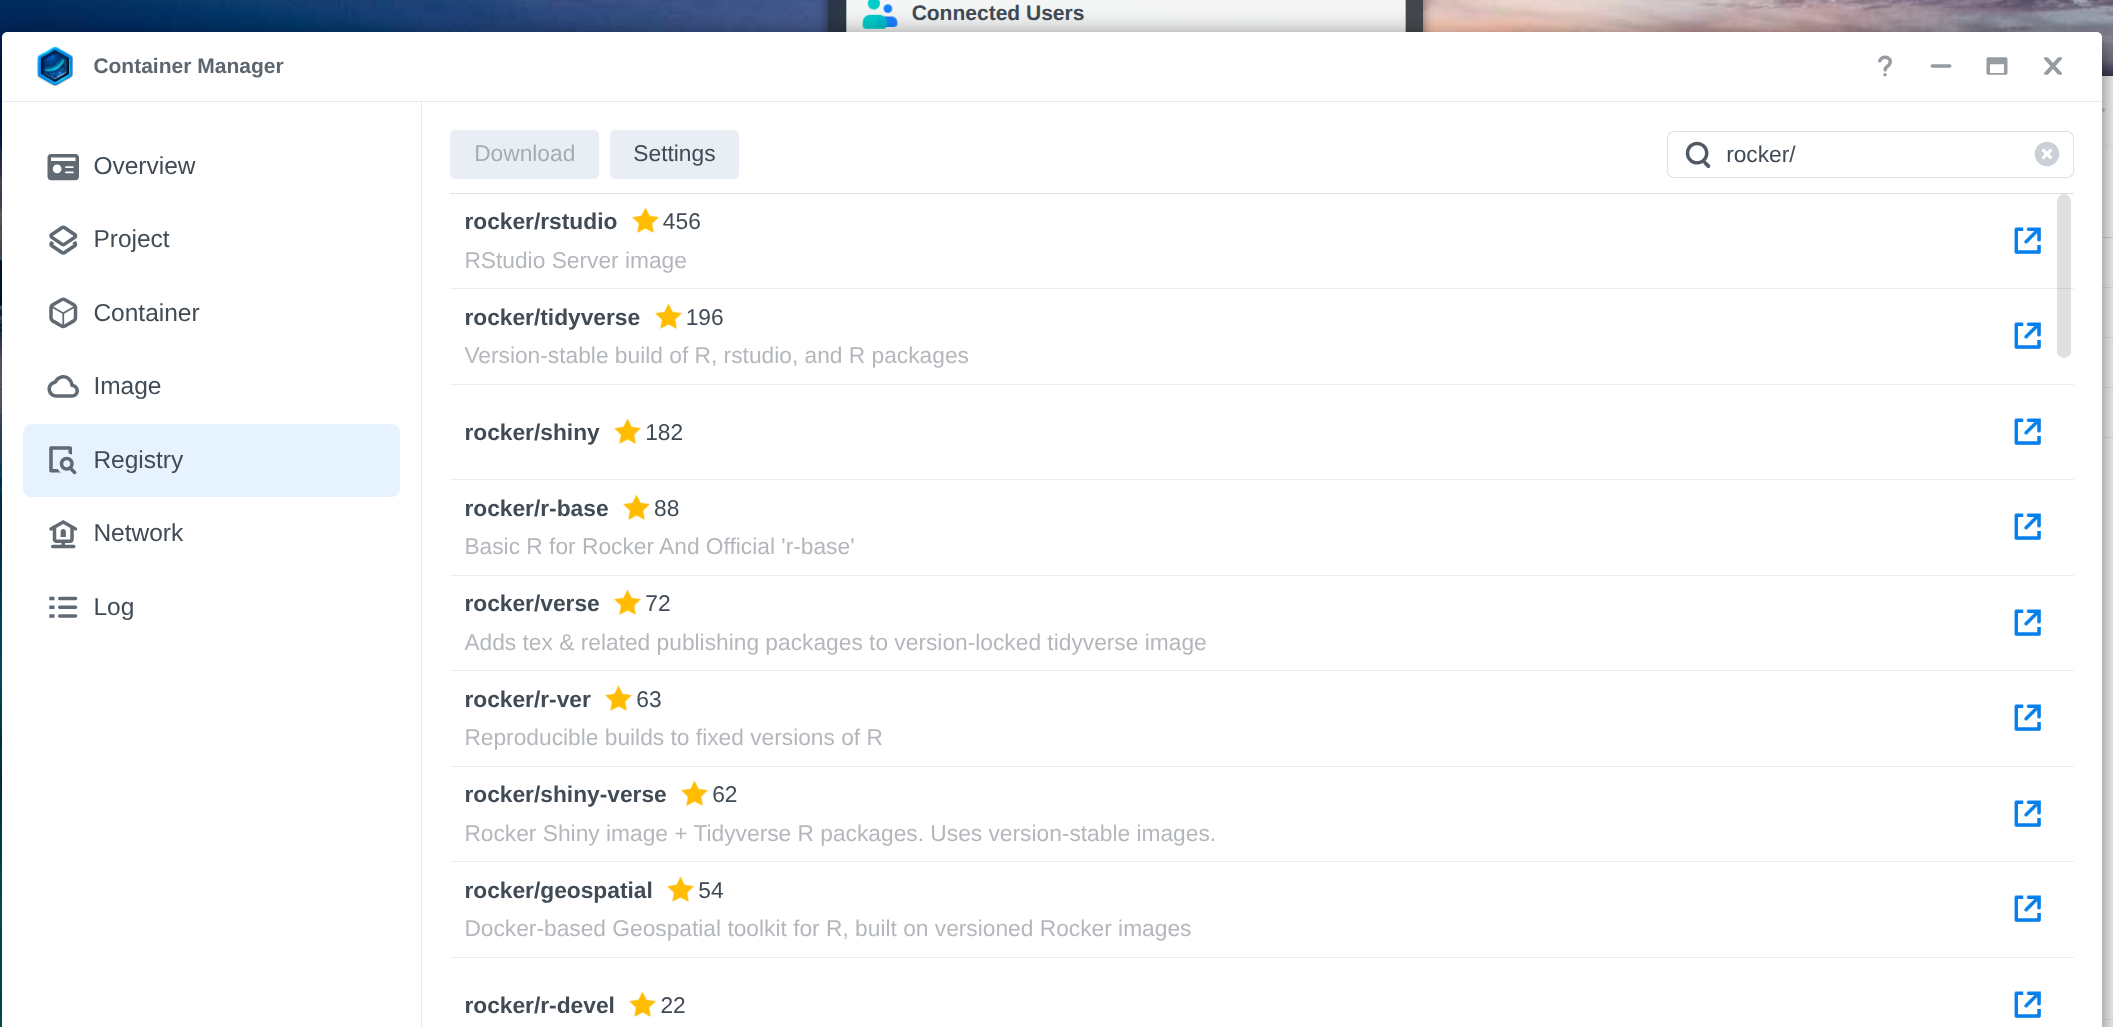
Select the appropriate Rocker image for Shiny Server.
In this case, I selected rocker/shiny-verse. This includes Shiny server, as well as the tidyverse package. 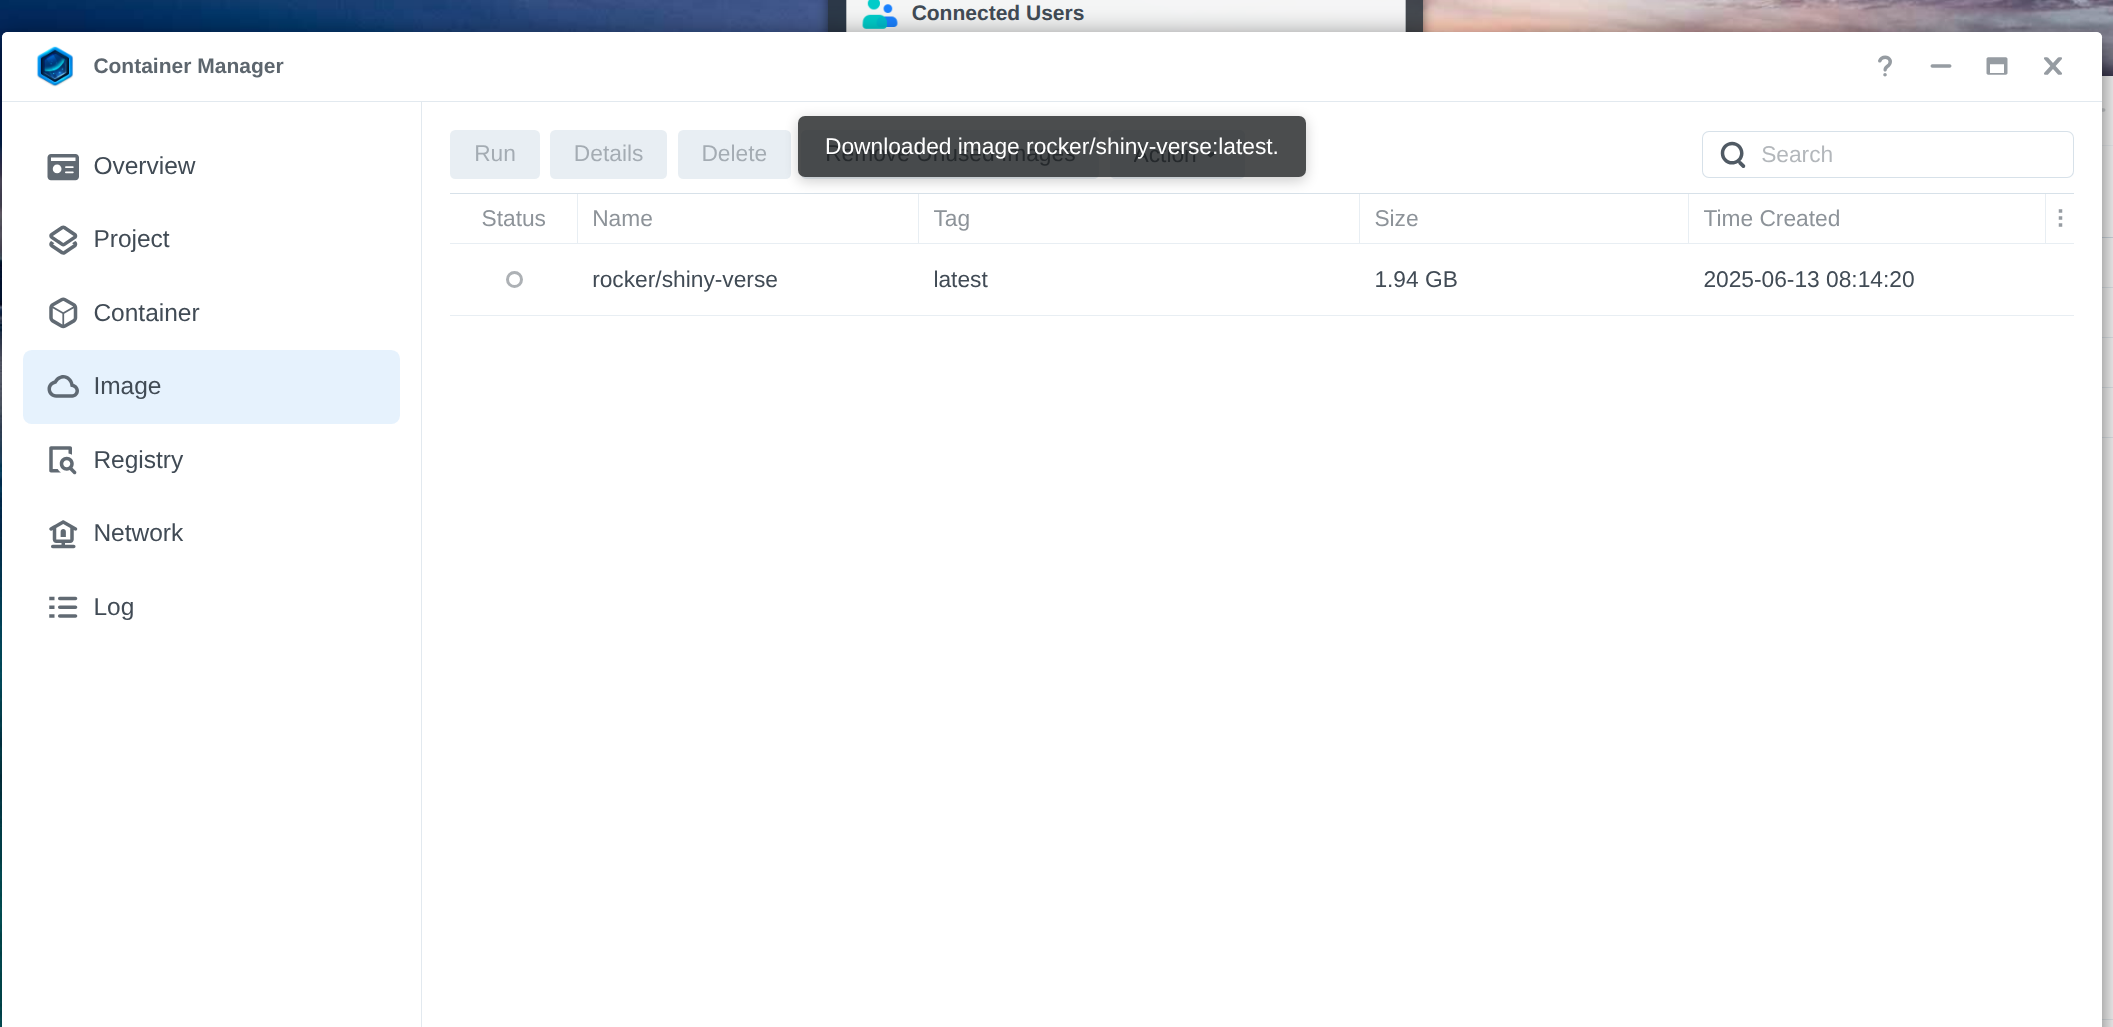
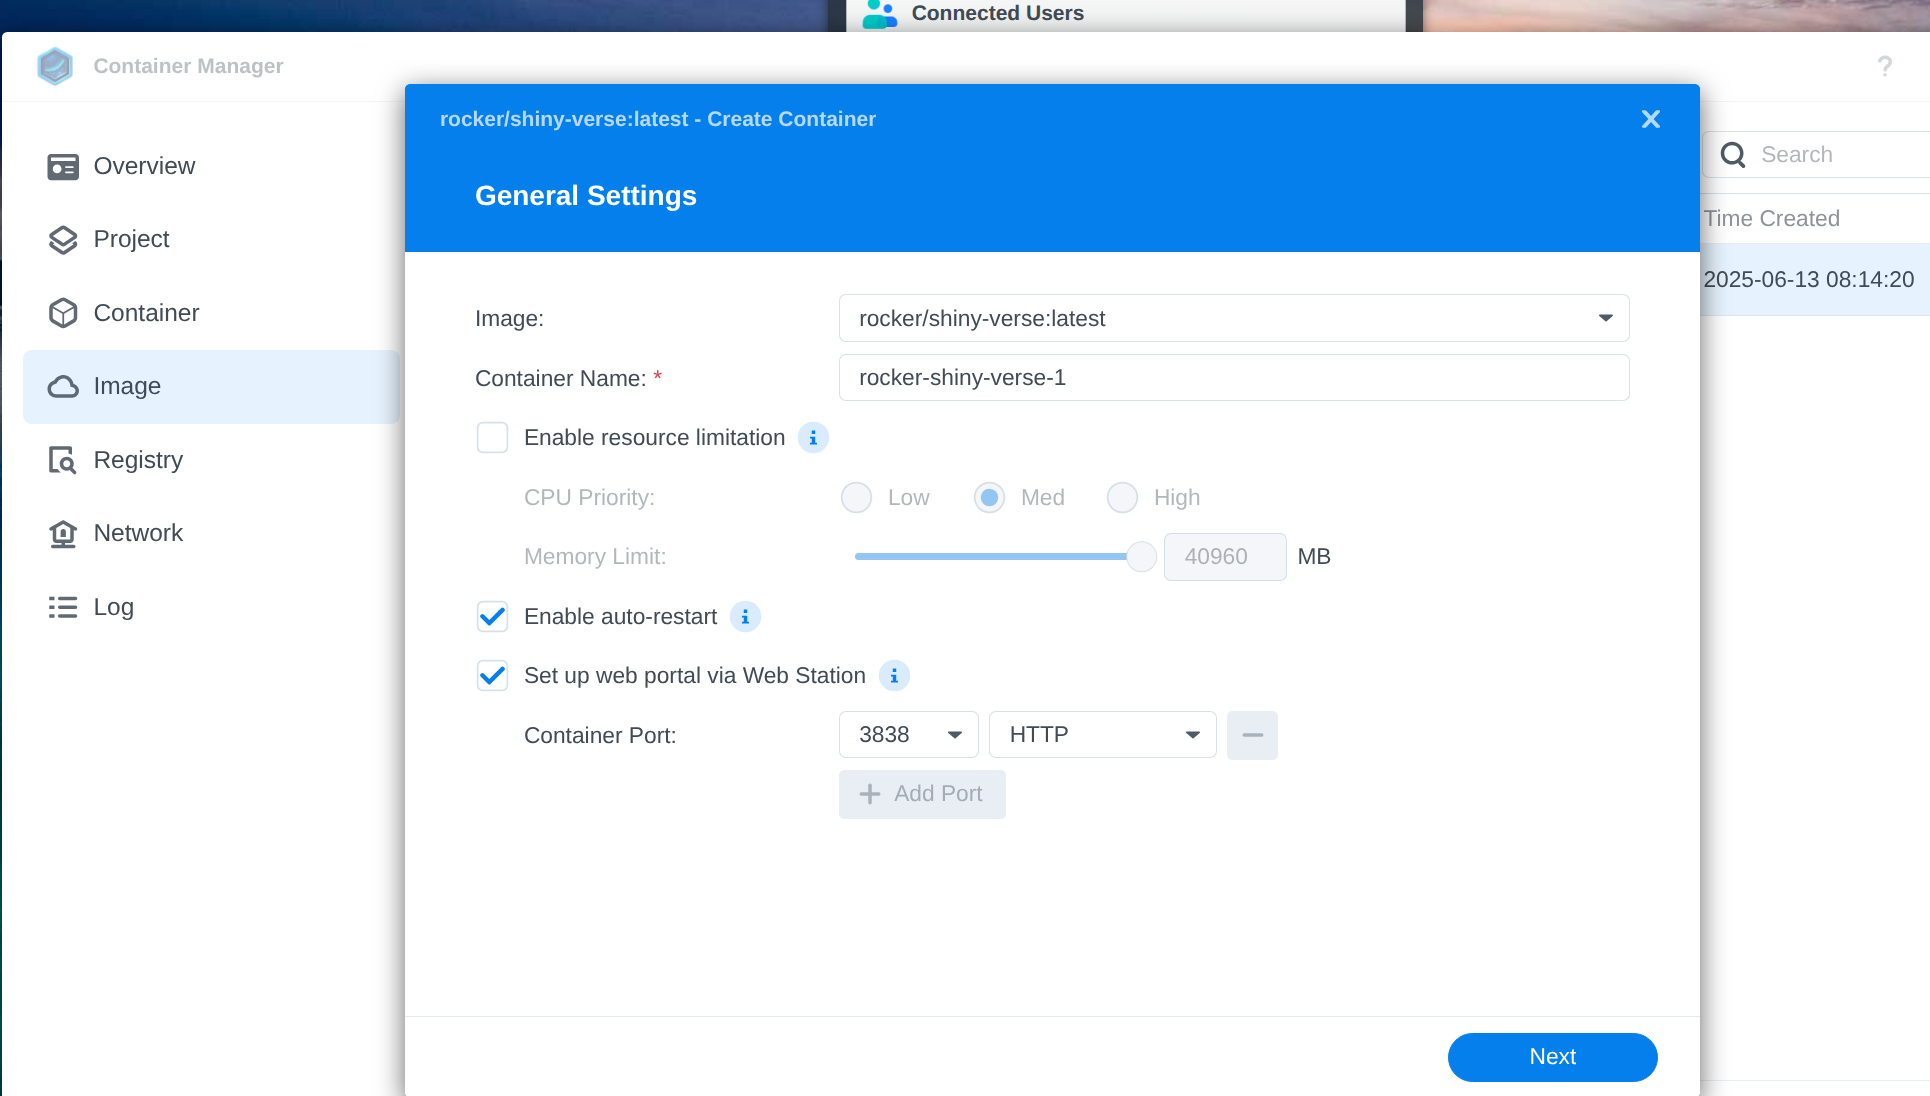
- Create and configure a new container using the selected image.
Check the boxes shown in the image below and leave the default port settings (3838 and HTTP).
- Set up volume mounts to link the app code and data to the container.
To do this, I cloned the vims-resazurin GitHub repo to the following Synology location: /volume2/docker/shiny-verse/.
When setting the volumes, we’ll need two locations for this particular Shiny app. The reason for this is the Shiny app (GitHub) uses relative paths to access other files within the repo. Otherwise, if all the files referenced were in the same directory as the Shiny app, we could mount just that location.
So, I mounted (bound) the following two locations. These are listed Synology location, followed by container location.
/volume2/docker/shiny-verse/vims-resazurin/mainto/srv/shiny-server. This shares all files within thevims-resazurinrepo with the Shiny server location in the container./volume2/docker/shiny-verse/vims-resazurin/main/code/shiny-appto/srv/shiny-server/resazurin.
This shares the Shiny app location on the Synology with the Shiny server in the container and provides it with a custom name. In this case, `resazurin`.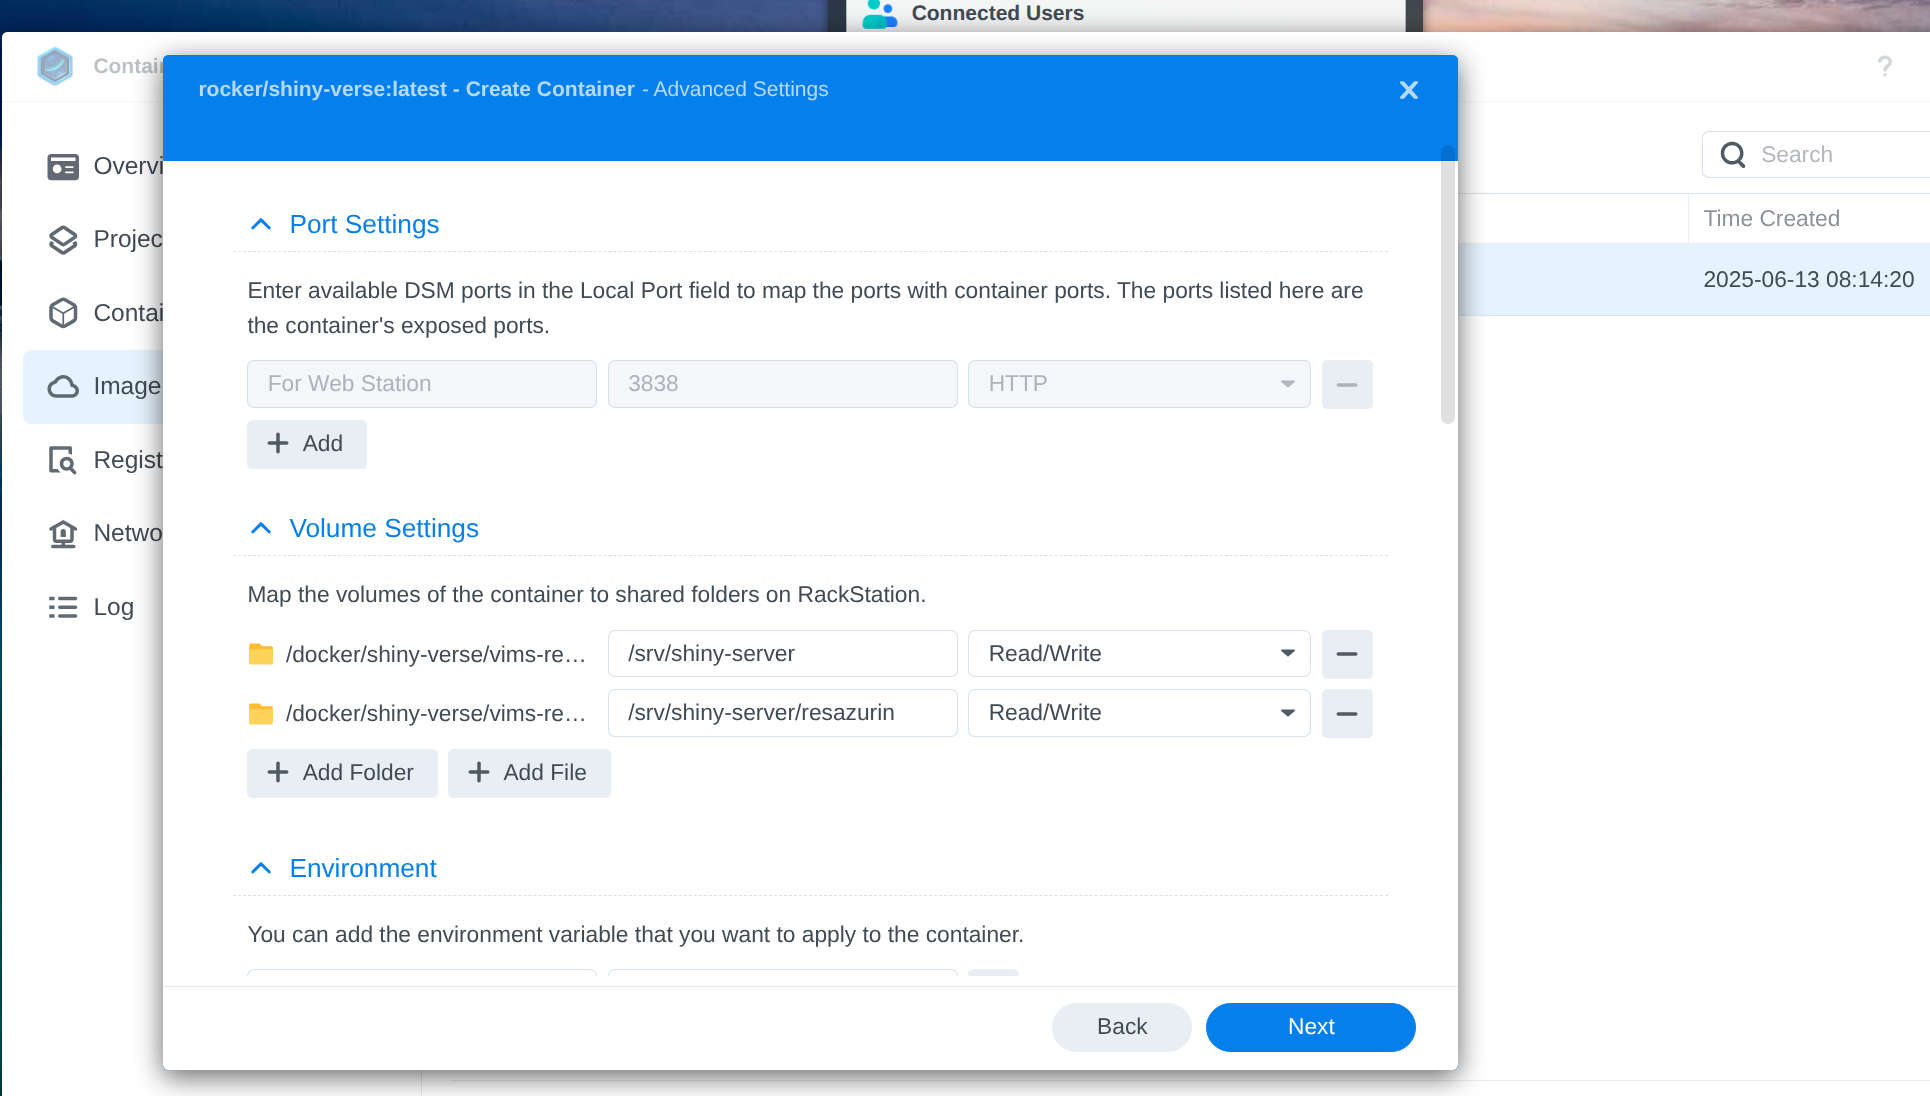
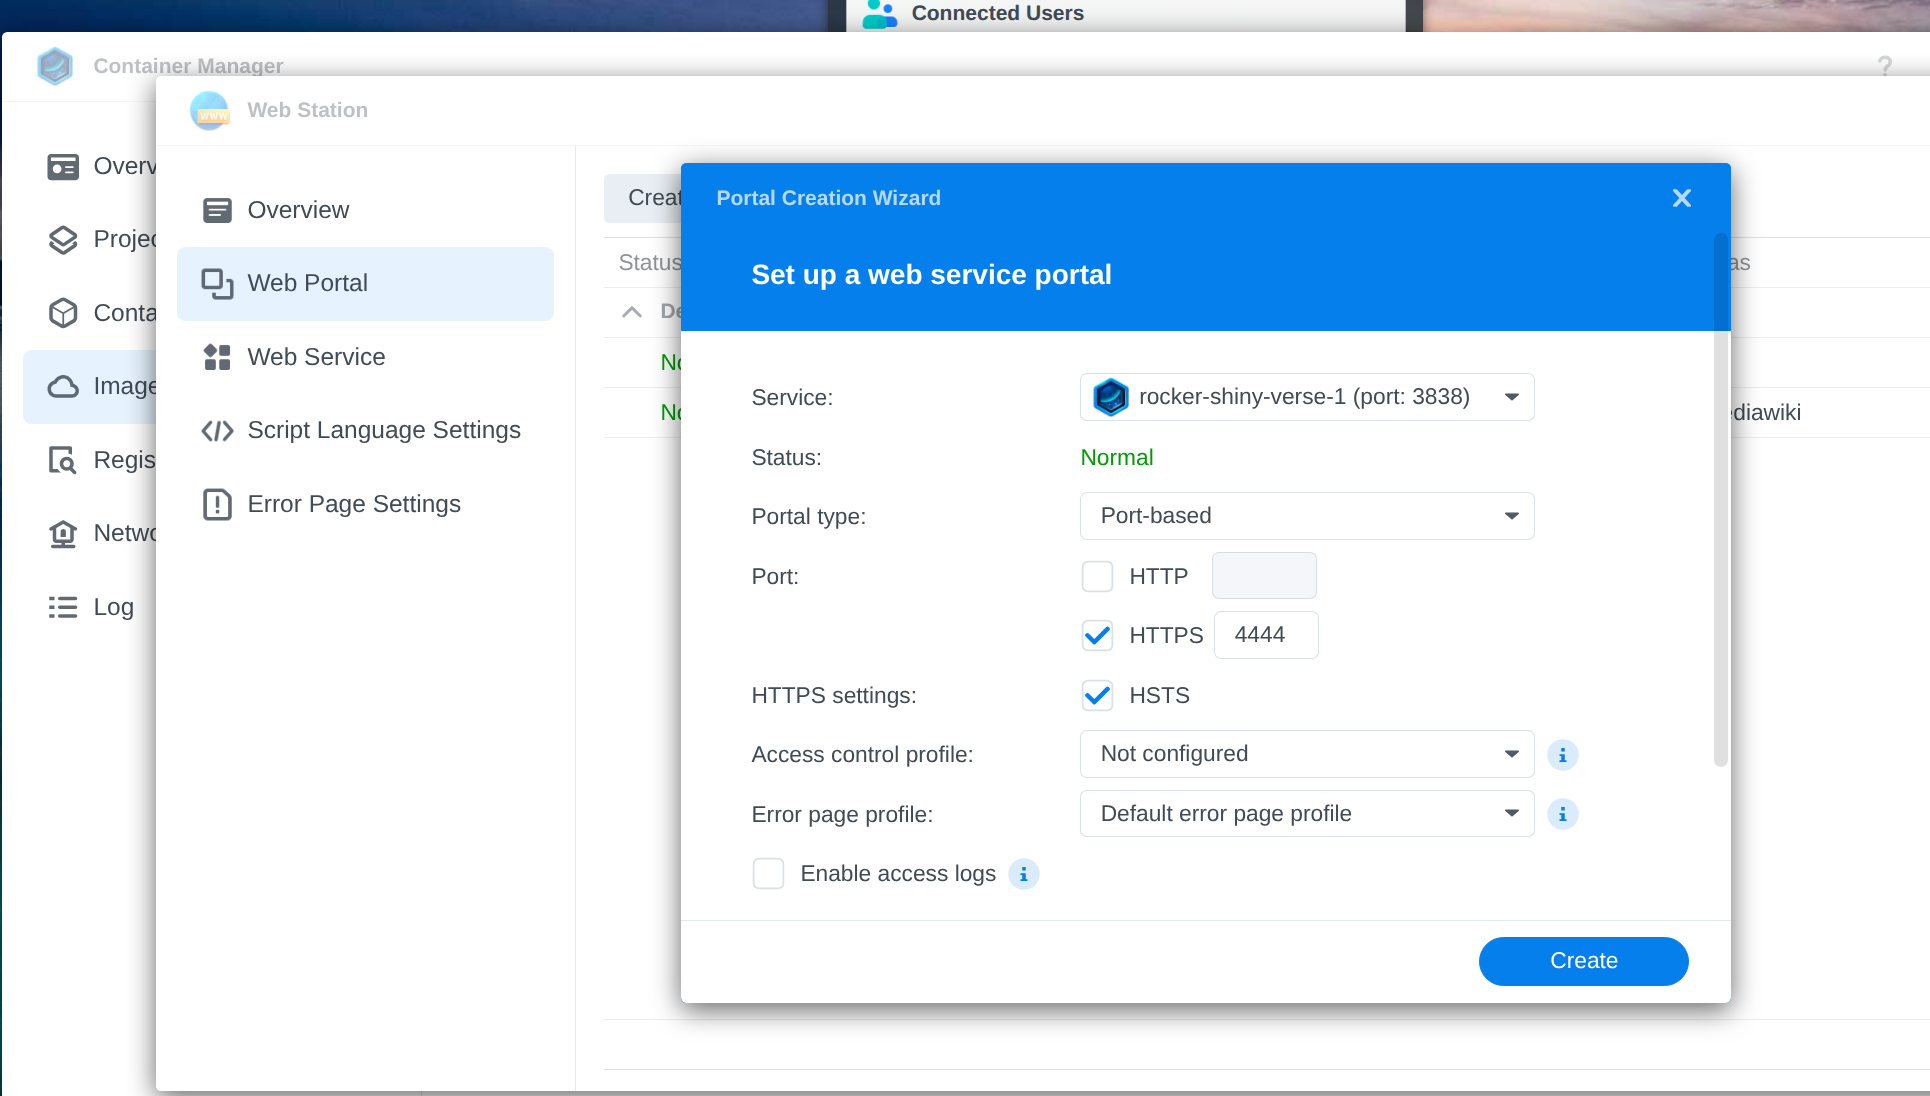
- Configure web portal settings for external access.
The HTTPS port number can really be any value you’d like. There are some reserved ports, but it’s a small quantity, so feel free to pick whatever.
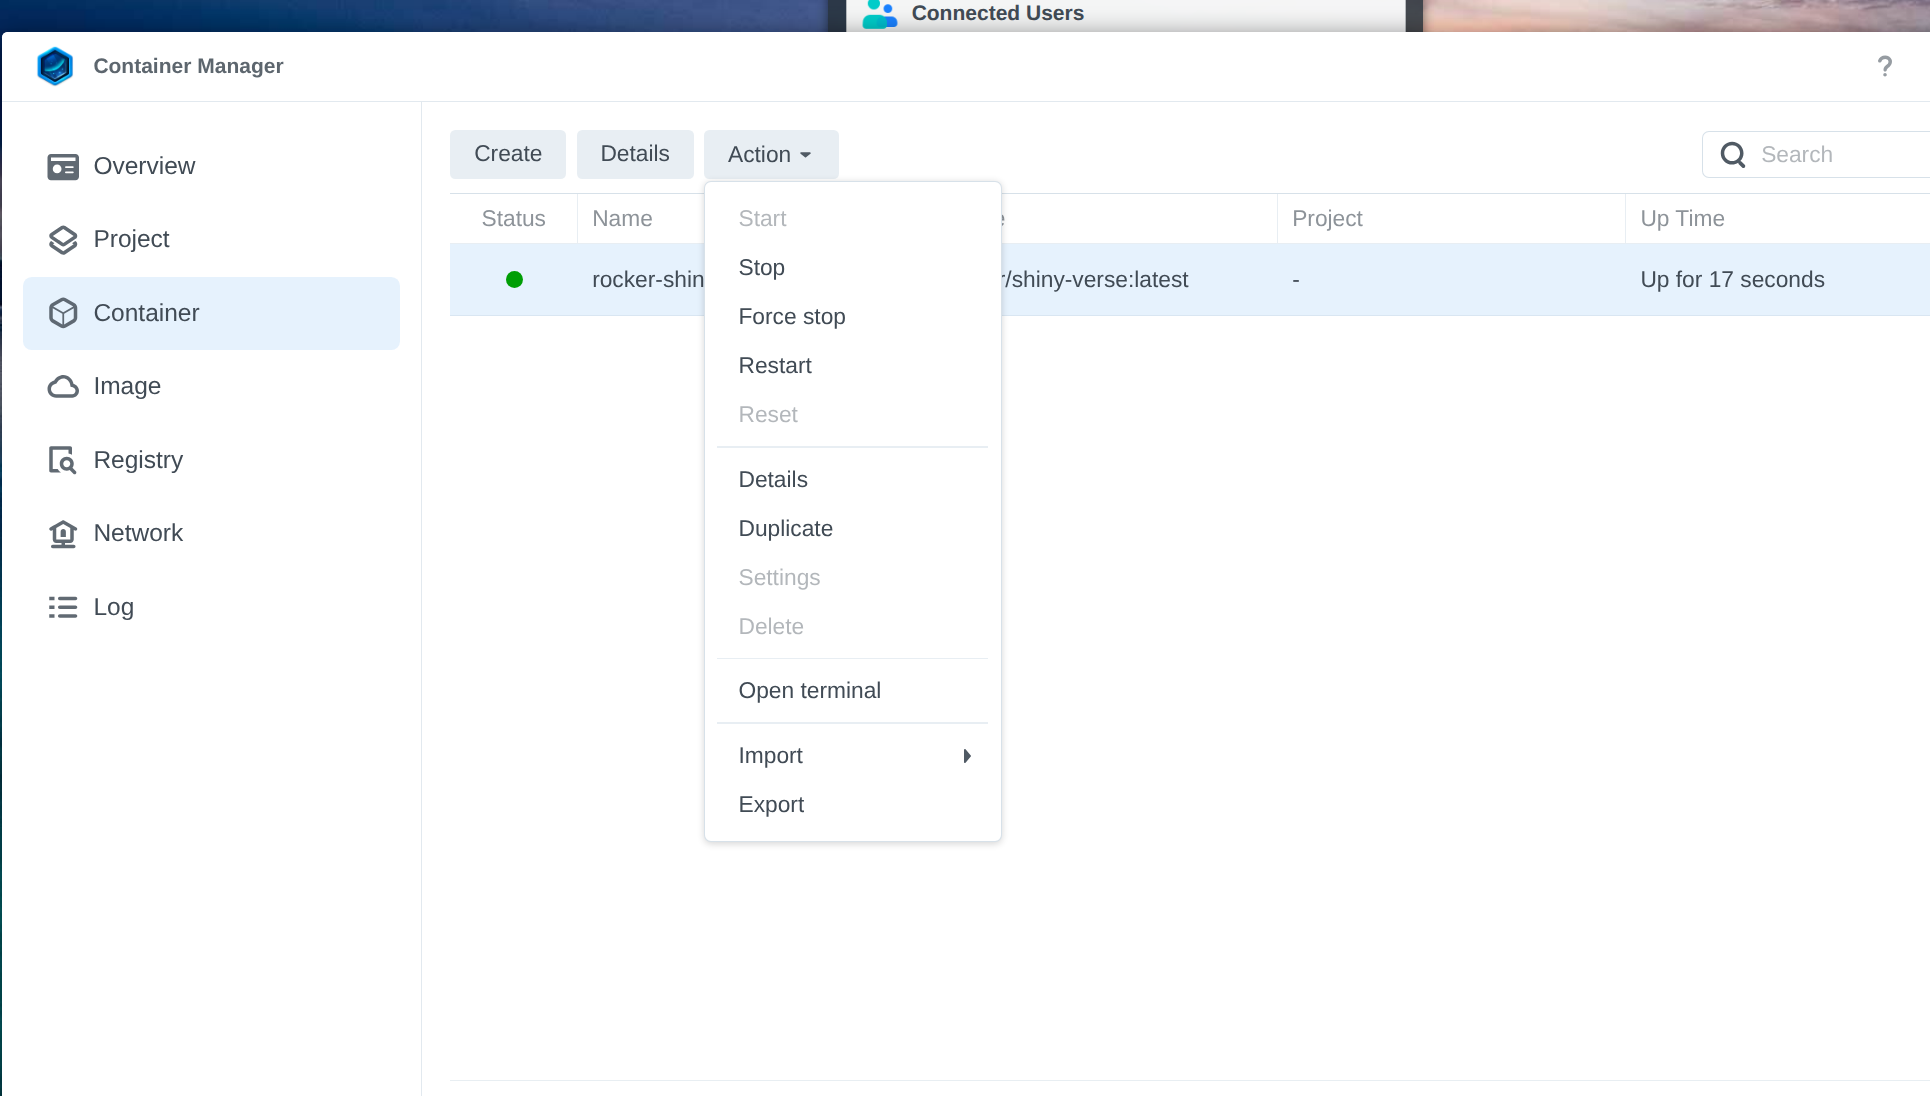
- Open a terminal in the running container to install required R packages.
The Shiny app requires additional R packages which aren’t in the container by default. To install them, you have to open a terminal in the container. Pick “Terminal” from this dropdown menu:
- Run the R command to install all necessary packages for the app.
Here’s the full command:
R -e "install.packages(c('shiny', 'shinythemes', 'readxl', 'tidyverse', 'tools', 'DT', 'plotly', 'pracma', 'stringr'))"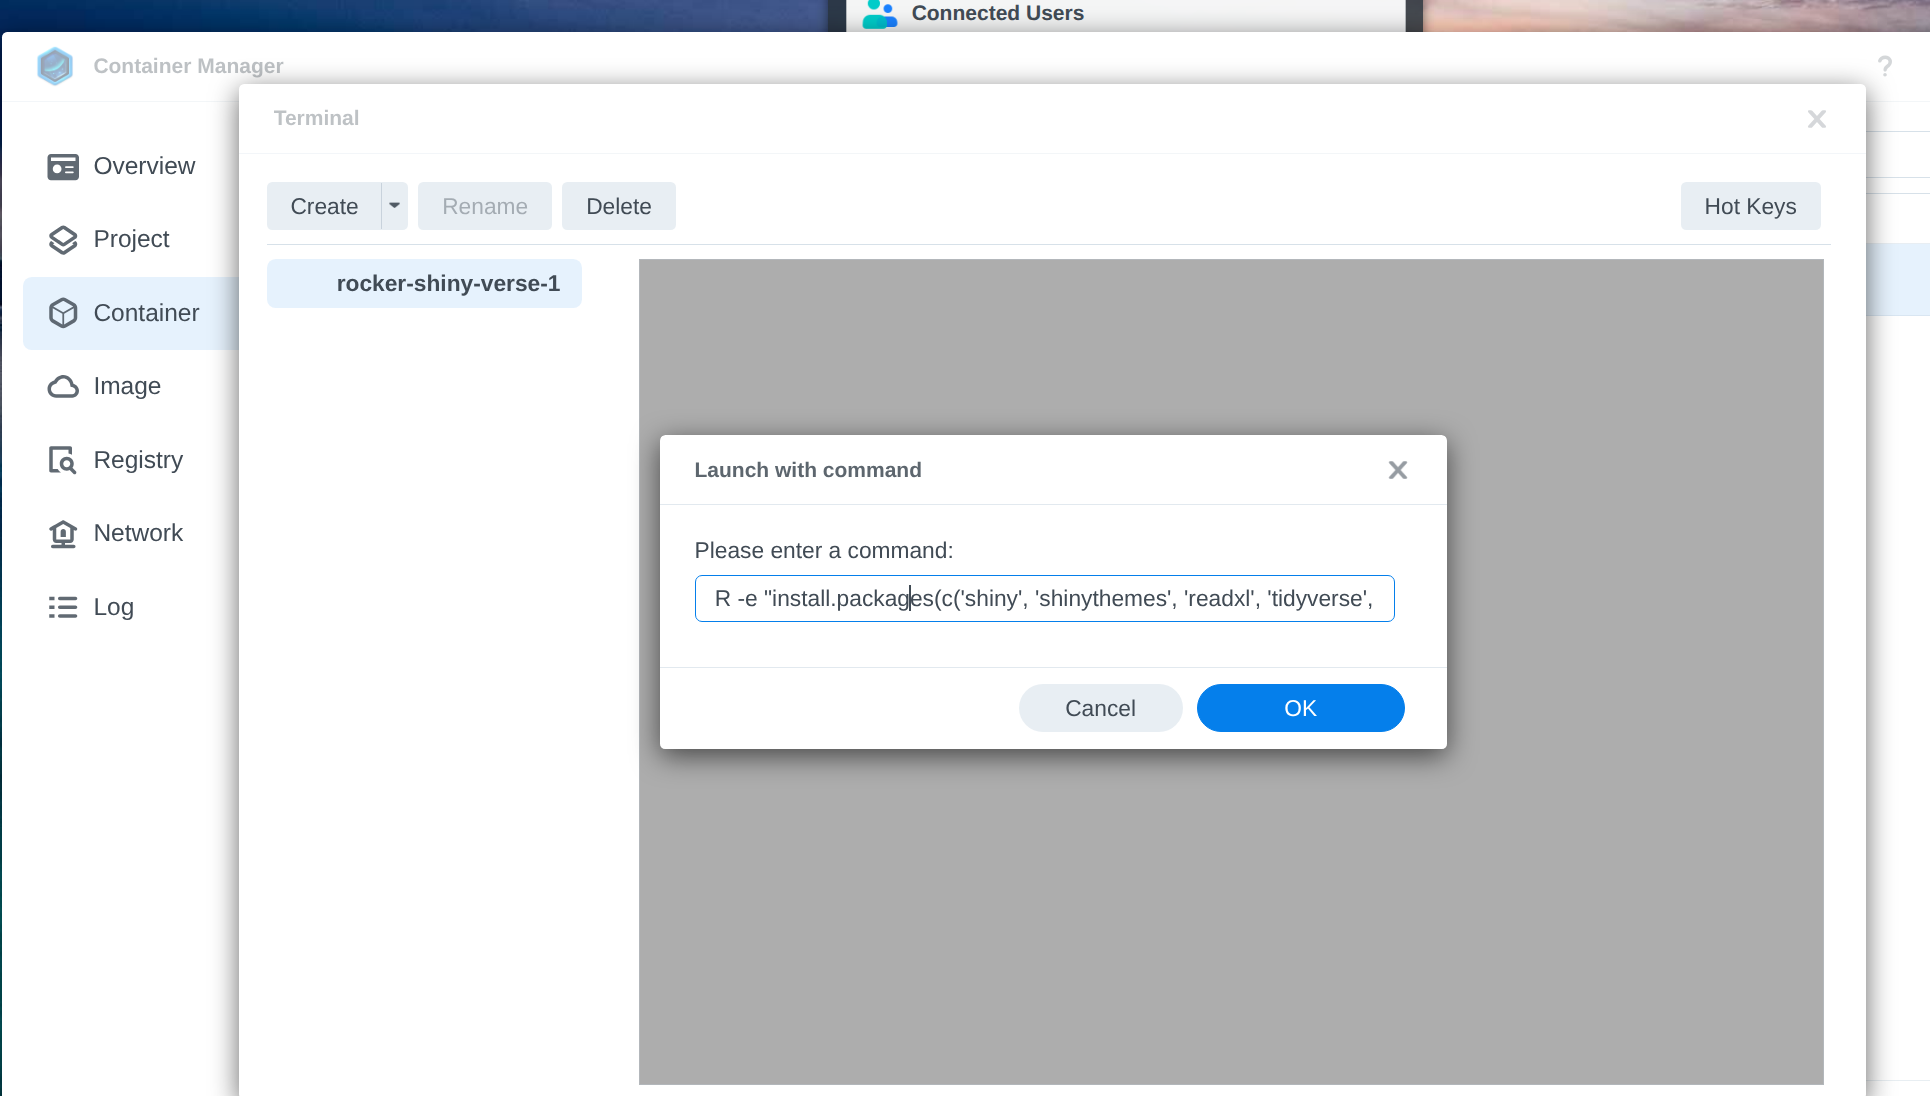
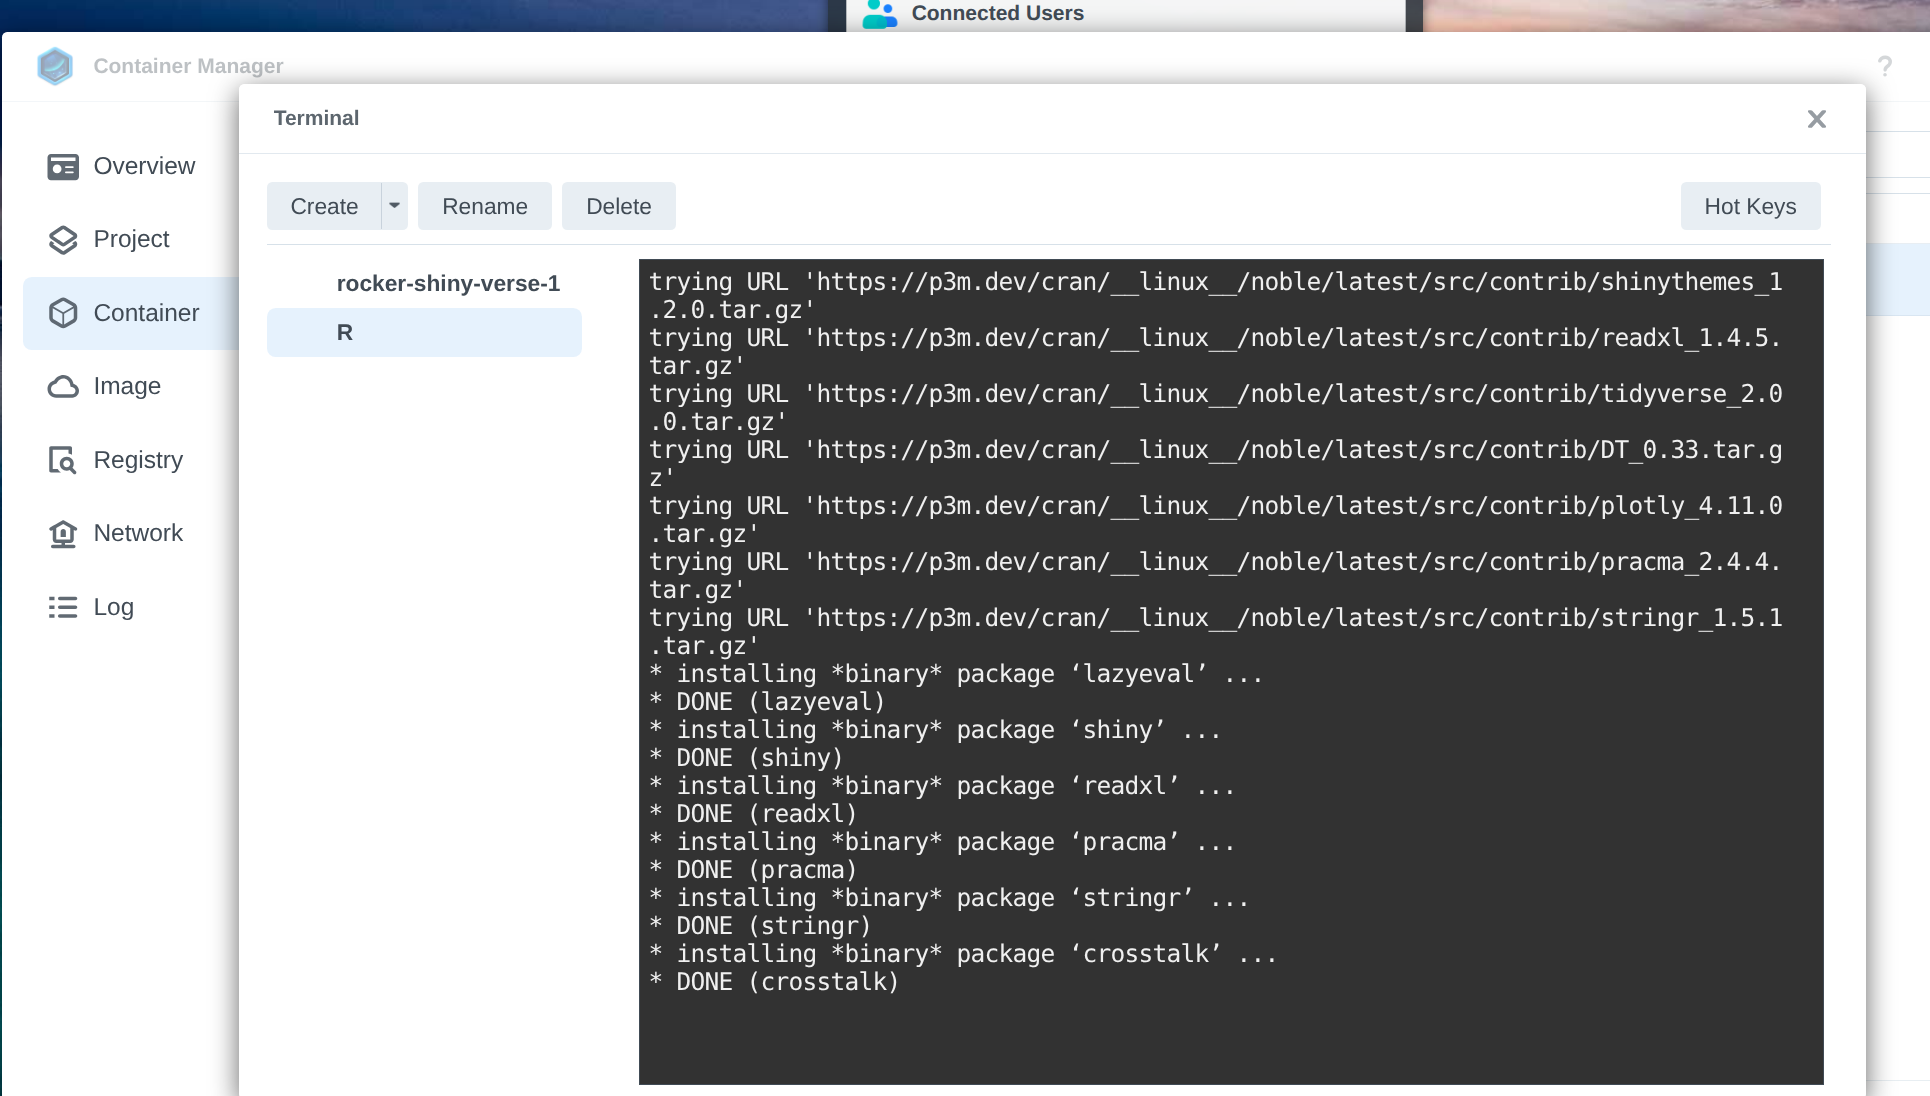
Monitor the installation process to ensure all packages are installed successfully.
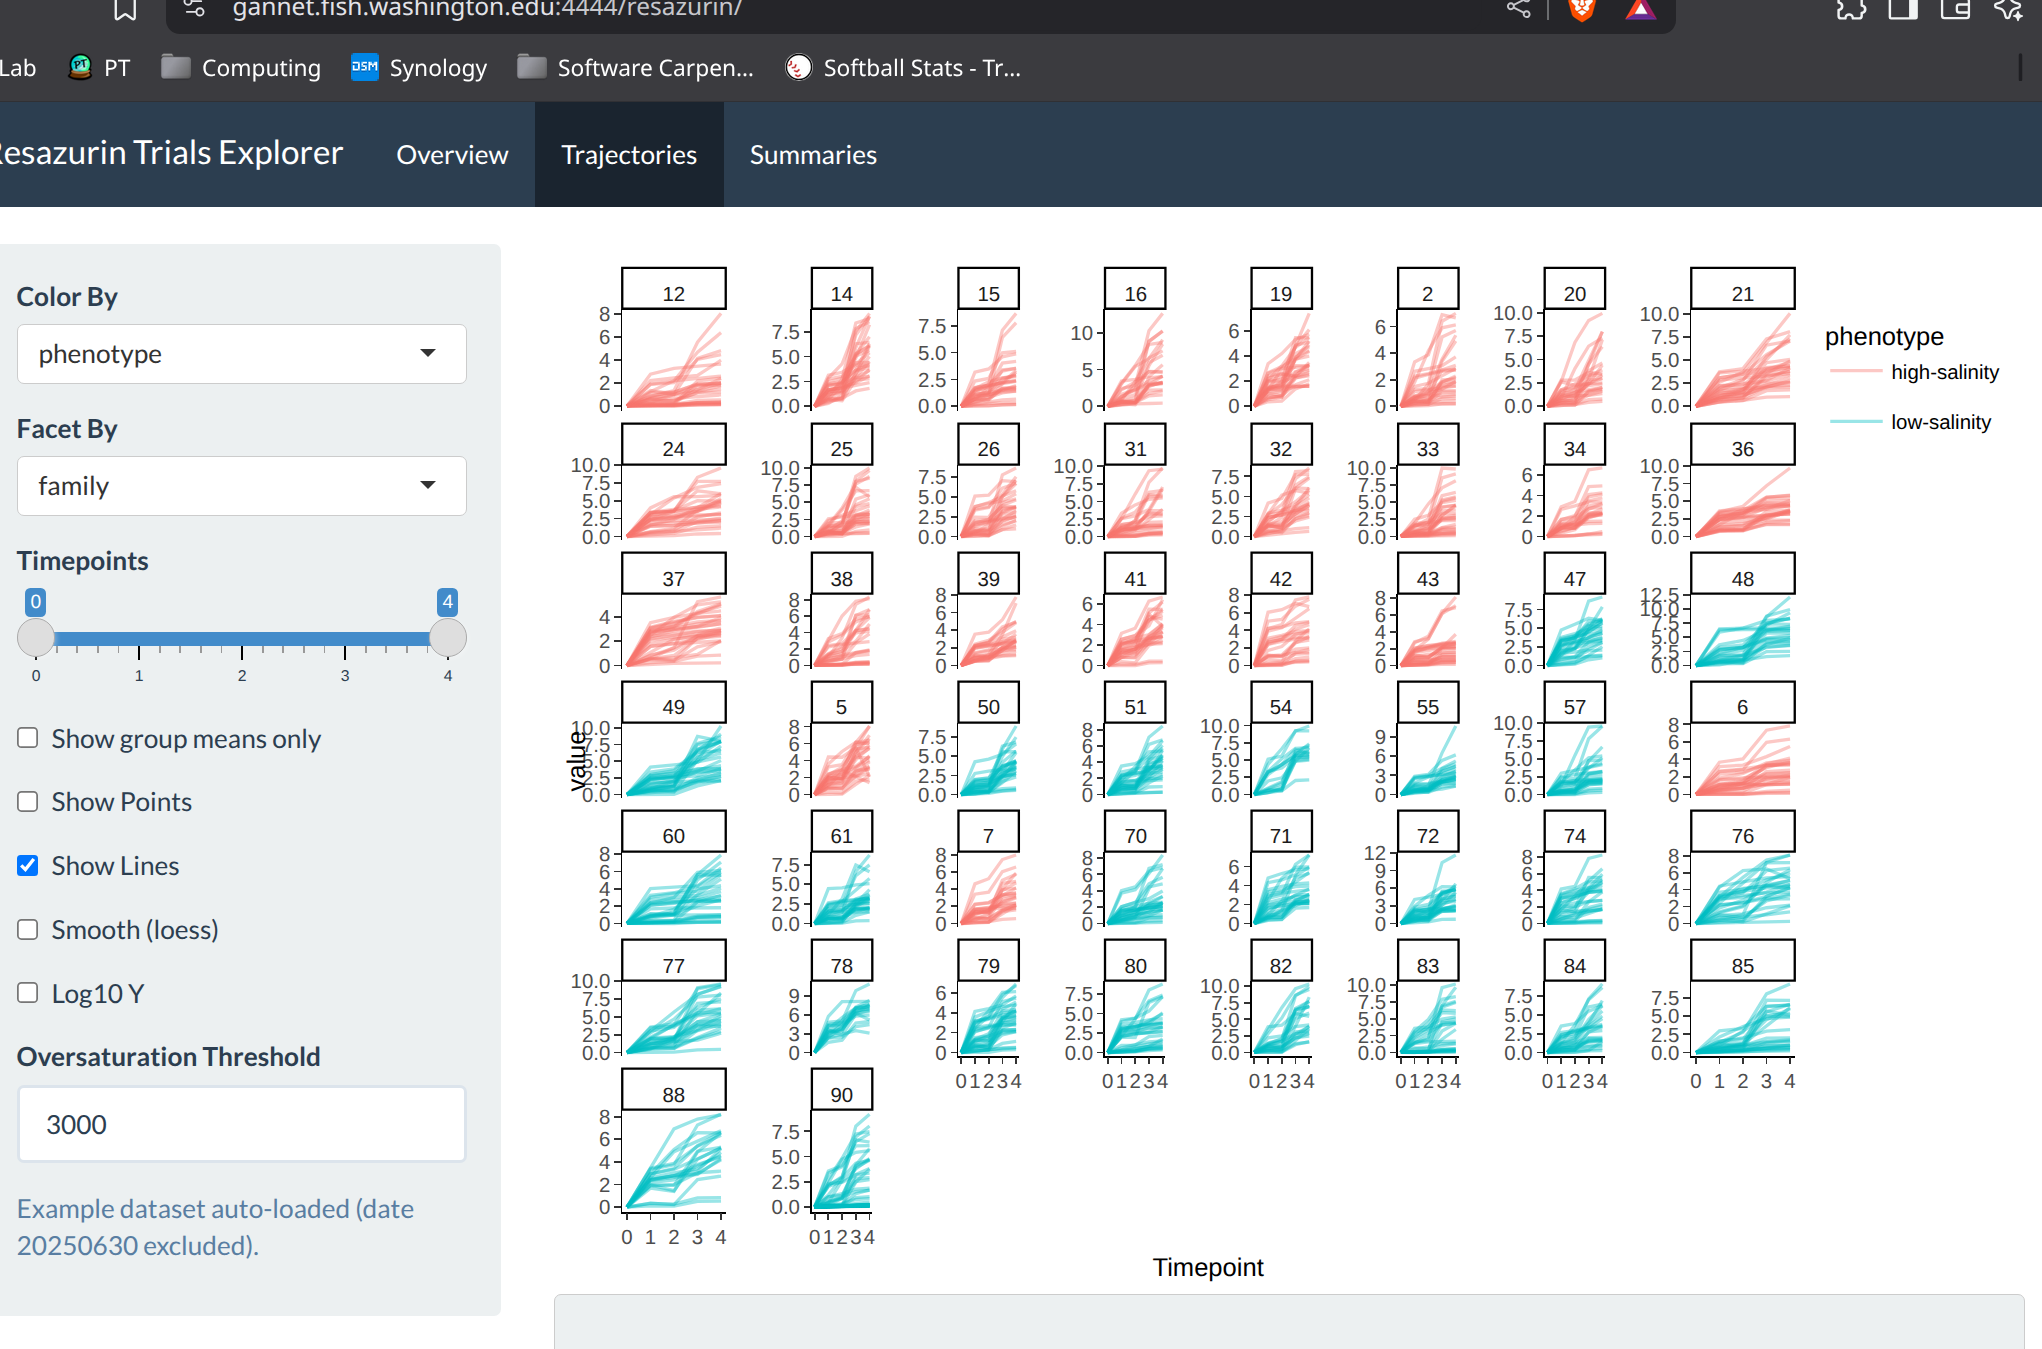
Access the running Shiny app via the web interface to confirm functionality.
This becomes accessible at our existing domain (gannet.fish.washington.edu), followed by the port number we set in Step 5 above (4444), followed by the custom name we set (resazurin) in Step 4 during mounting/binding volumes to the container.