INTRO
The PASA pipeline (GitHub) was used to generate transcriptome annotations using the RNA-seq data for the three coral species in the `timeseries_molecular project (GitHub) project. The PASA web portal provides a user-friendly interface to explore and visualize the results of the PASA pipeline, including gene models, alignments, and annotations.
Below, I detail the steps I took to configure the PASA web portal on Gannet using the Synology Container Manager. This includes building a custom Docker image with the necessary Perl modules, transferring it to the Synology, and setting up the container to run the PASA web portal.
METHODS
The example below uses the peve_pasa database, but you can replace it with your database name as needed.
Build and Transfer Docker Image
This doesn’t have to be done on a local computer; you can build the image directly on the Synology if you have the necessary tools and permissions. However, building locally and transferring can be faster and more convenient in some cases.
Build the image (if not already done)
cd /home/shared/8TB_HDD_01/sam/gitrepos/urol-e5/timeseries_molecular/E-Peve/output/00.30-E-Peve-transcriptome-assembly-Trinity/PASA
sudo docker build -t pasapipeline-fixed:latest -f Dockerfile.pasaweb .
Here’s what’s in
Dockerfile.pasaweb:$ cat Dockerfile.pasaweb FROM pasapipeline/pasapipeline:latest # Install missing Perl modules required for PasaWeb RUN cpan -i CGI GD::Graph # Keep the original entrypointSave the image to a tar file.
sudo docker save pasapipeline-fixed:latest \
> /home/sam/pasapipeline-fixed.tar
Transfer to Synology (replace with your Synology details).
rsync -avP pasapipeline-fixed.tar \
gannet:/volume2/docker/PASA_web_portal/
Synology Configuration Steps
Command Line Setup
On Synology, via command line:
Load the pre-built image
cd /volume2/docker/PASA_web_portal
sudo docker load -i pasapipeline-fixed.tar
Grant MySQL permissions (if not already done):
mysql -u root -p<password>GRANT SELECT ON peve_pasa.* TO 'pasa_access'@'localhost';
GRANT SELECT ON apul_pasa.* TO 'pasa_access'@'localhost';
GRANT SELECT ON ptua_pasa.* TO 'pasa_access'@'localhost';
FLUSH PRIVILEGES;Create/import databases (if not already done):
mysql -u root -p -h127.0.0.1 -P3307 <<'EOF'
CREATE DATABASE IF NOT EXISTS peve_pasa;
EOF
Fix collation issue in the SQL dump file (if needed):
sed -i 's/utf8mb4_0900_ai_ci/utf8mb4_general_ci/g' '/volume2/web/gitrepos/urol-e5/timeseries_molecular/E-Peve/output/00.30-E-Peve-transcriptome-assembly-Trinity/PASA/peve_pasa_backup.sql'Load the SQL dump into the database:
mysql -u root -p<password> -h127.0.0.1 -P3307 peve_pasa \
  < /volume2/web/gitrepos/urol-e5/timeseries_molecular/E-Peve/output/00.30-E-Peve-transcriptome-assembly-Trinity/PASA/peve_pasa_backup.sql
Web Interface
Then, access the Synology via the web interface and set up the container.
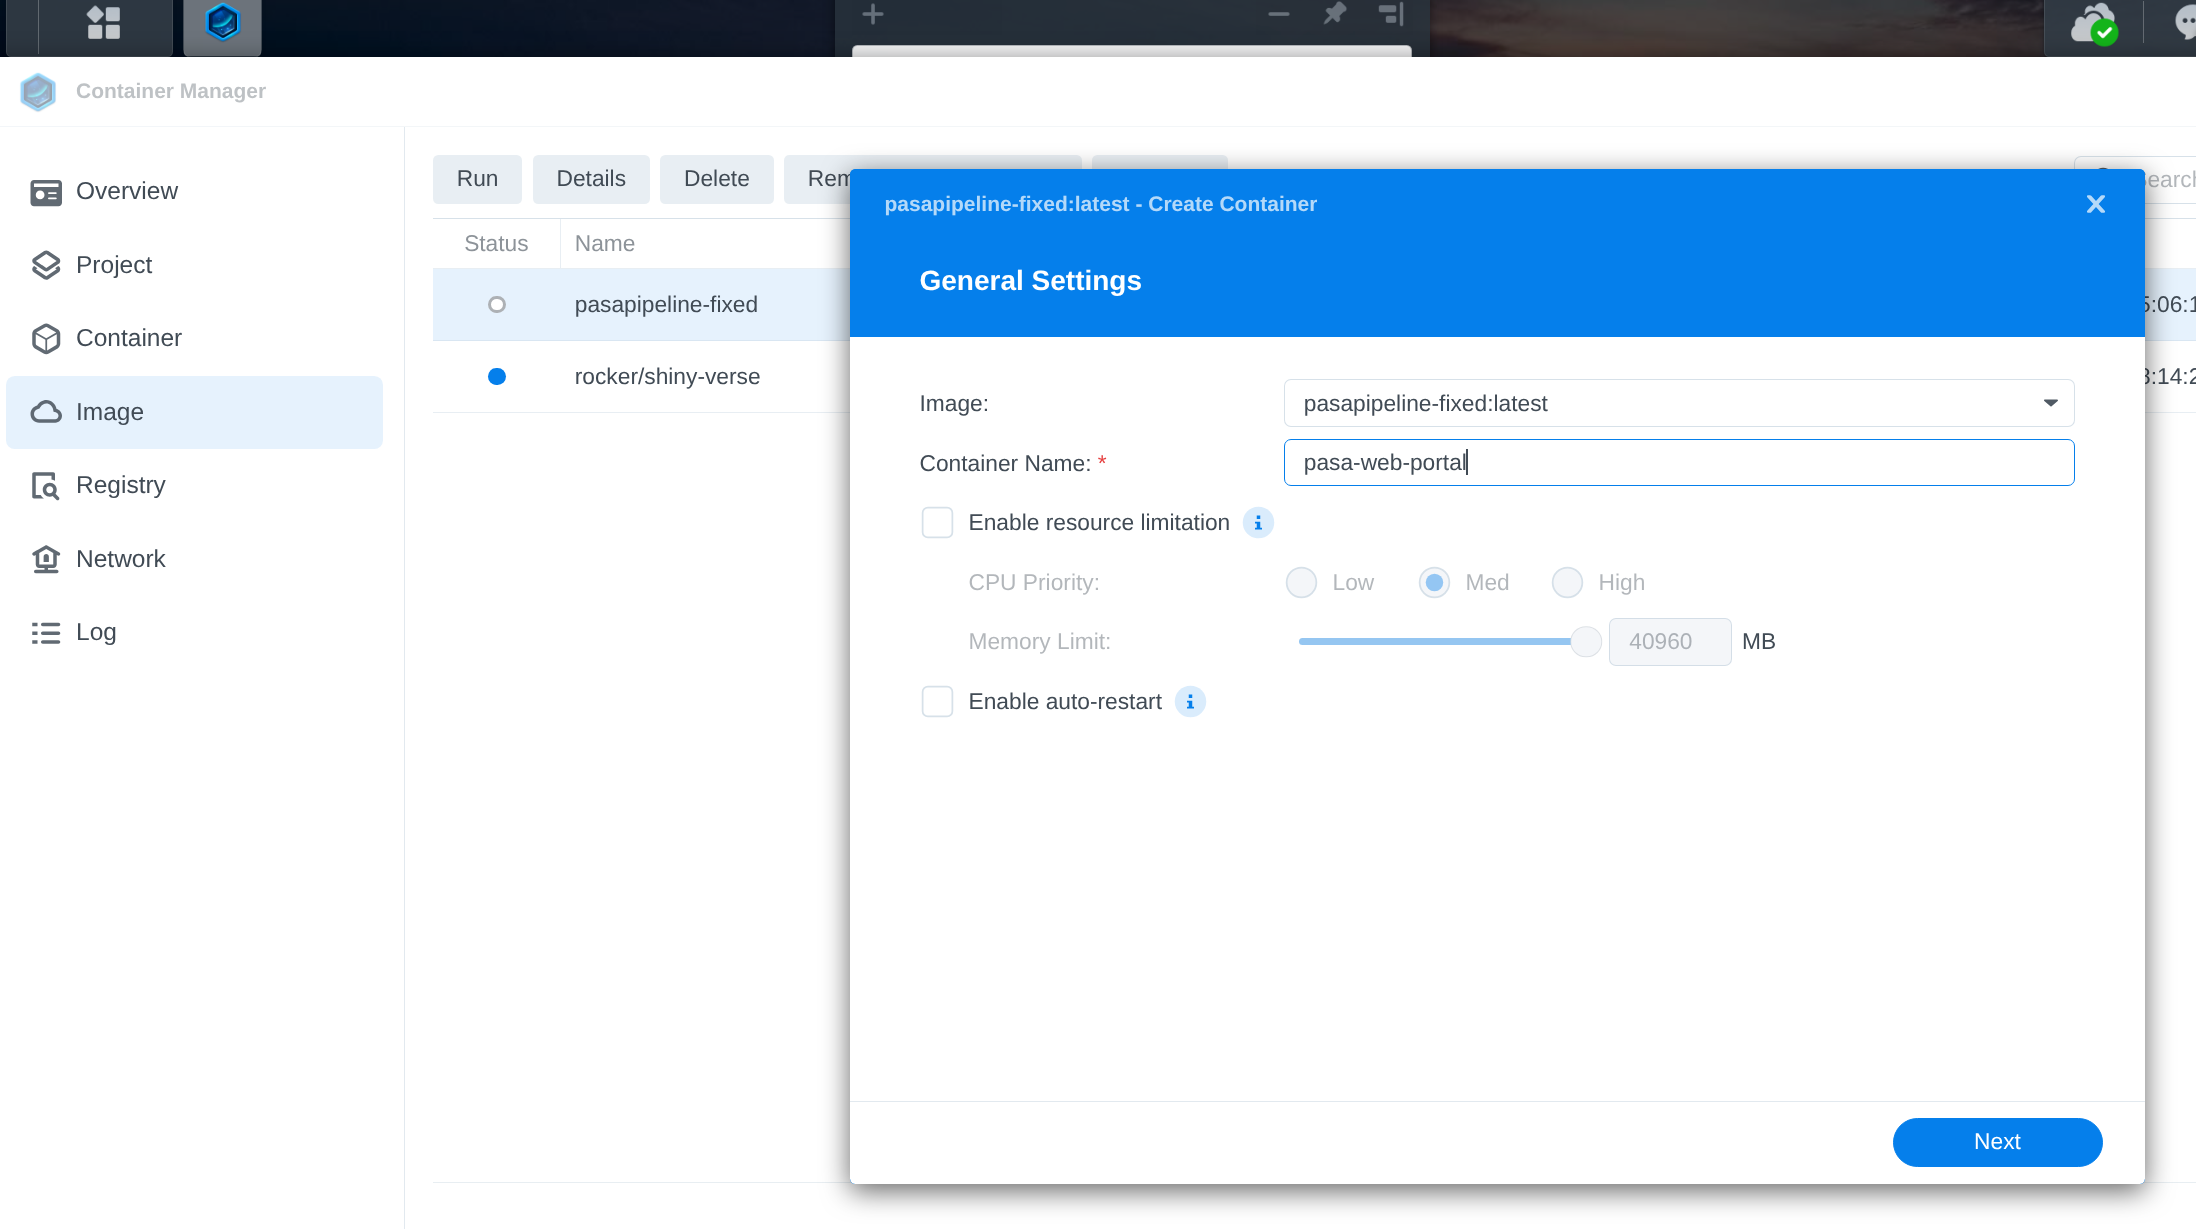
In the Container Manager app, create a new container with these settings:
Go to the “Image” tab You should see pasapipeline-fixed:latest in the list of images.
Click on the image, then click “Launch” or “Run”
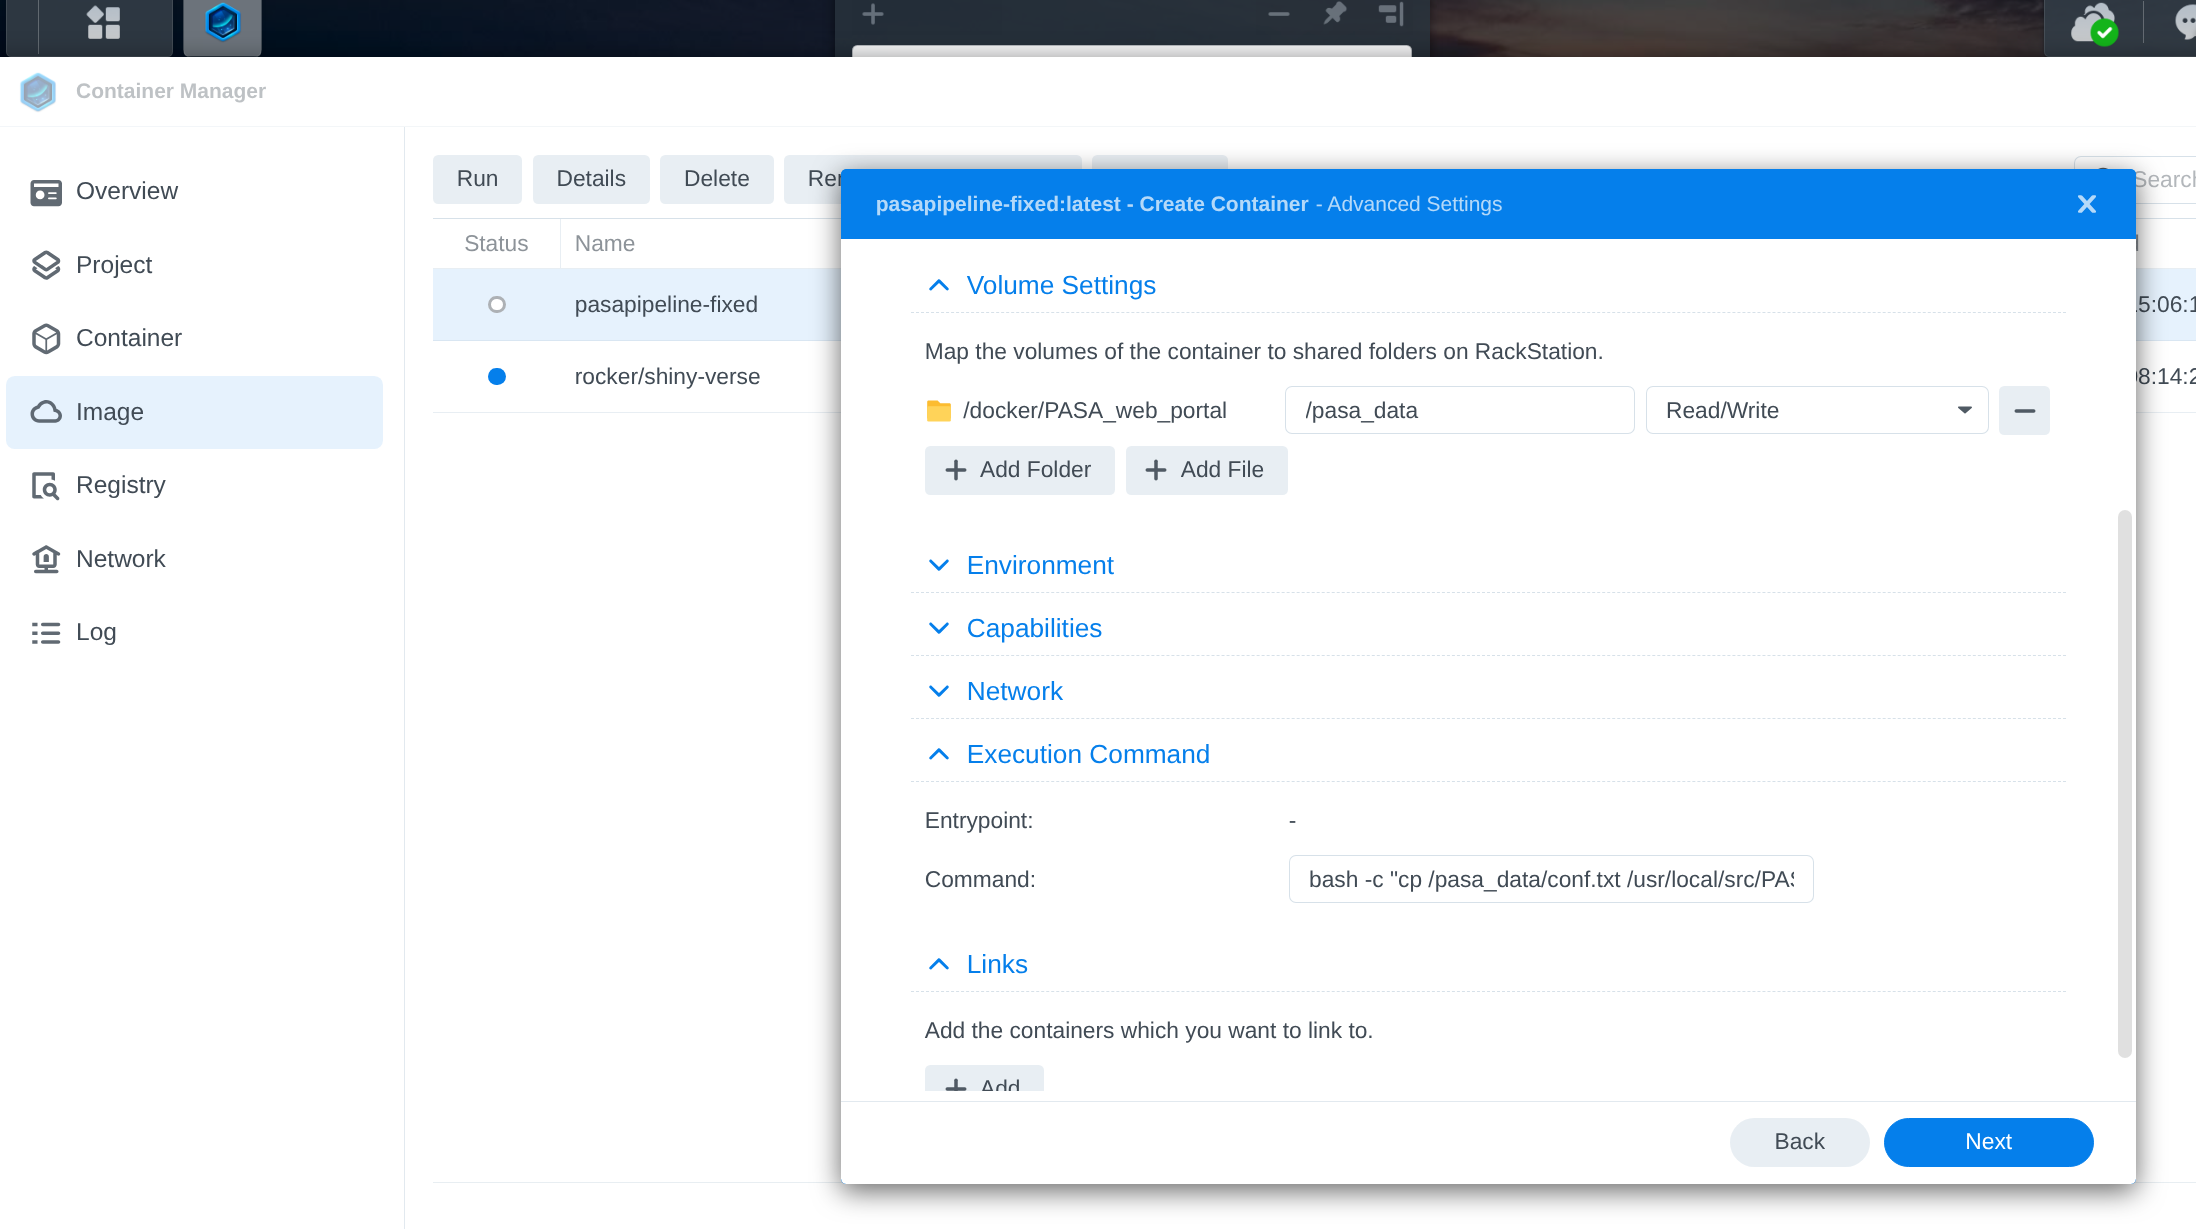
This opens the container creation wizard where you configure: - Container name - Port mappings - Volume mounts - Environment variables - xecution Command: bash -c "cp /pasa_data/conf.txt /usr/local/src/PASApipeline/pasa_conf/conf.txt && /usr/local/src/PASApipeline/run_PasaWeb.pl 9000" - Port Settings:
- Local Port: 9000
- Container Port: 9000
- Type: TCP
- Volume Mappings:
Host: /volume1/path/to/PASA/directory
Container: /pasa_data
Network:
Use bridge mode
Working Directory:
Access
http is used instead of https because the PASA web portal does not support SSL/TLS. Ensure that your network is secure and consider using a VPN if accessing remotely.
http://gannet.fish.washington.edu:9000 Enter database name when prompted (e.g., peve_pasa)