Jupyter Notebooks
These directions are taken from the Mox Hyak wiki found here.
Use Jupyter Notebook
-
Login to Hyak (MOX).
-
Start an interactive node session via
srun -p srlab -A srlab --time=hh:mm:ss --pty /bin/bash- Replace the
--time=hh:mm:sswith desired runtime. E.g.--time=02:00:00will set a runtime of 2hrs, 0mins, and 0secs.
- Replace the
-
Activate Anaconda 3:
conda activate -
Navigate to your desired working directory (e.g.
cd /gscratch/srlab/or/gscratch/scrubbed/). -
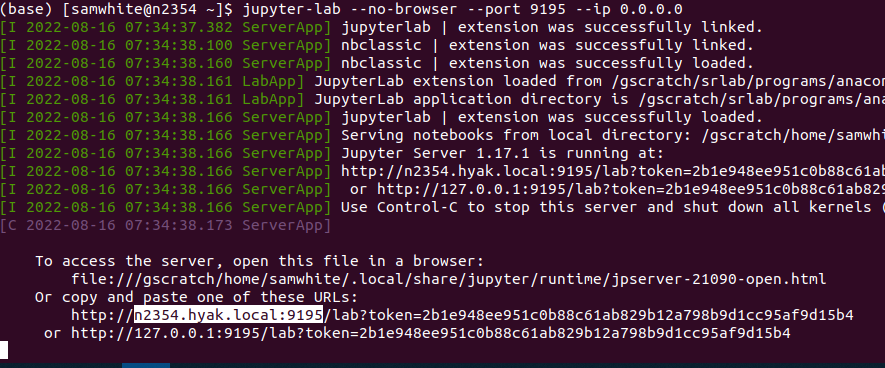
Start Jupyter Lab
jupyter-lab --no-browser --port 9000 --ip 0.0.0.0.- Make note of the NODE_NUMBER assigned to you (it will frequently be different each time you run this process) - highlighted in the screencap below:
-
In another terminal window on your local desktop, type
ssh <UW_NetID>@mox.hyak.uw.edu -L 9000:<NODE_NUMBER>.hyak.local:9000-
Replace
<UW_NetID>(including the<>) with your UW NetID. -
Replace
<NODE_NUMBER>(including the<>) with the node assigned to you in Step 3. -
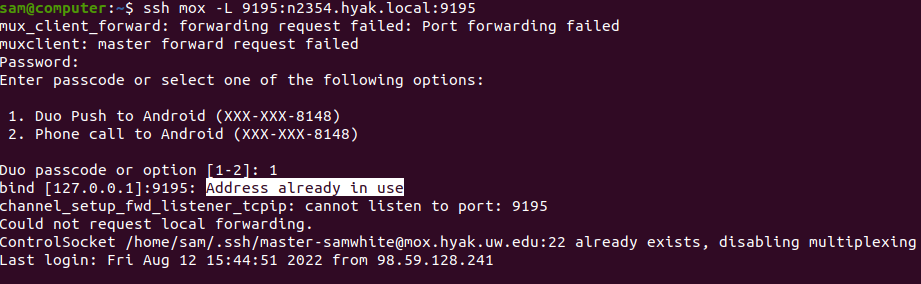
NOTE: If you receive the following error message (note the part highlighted in white), then close all of your terminals connected to Mox and start again; this time specifying a different port number in Step 5 (port number can be anything greater than 9000 and less than 65000):
-
-
In your local web browser, paste the lengthy URL provided in Step 3.